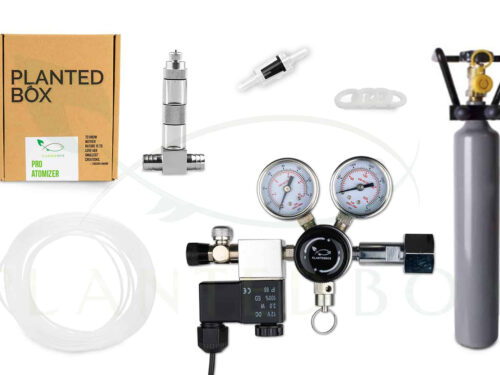
Pro atomizer

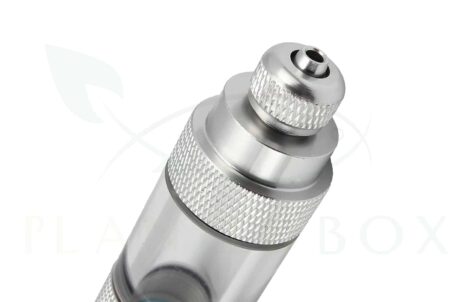
Adding CO2 to your aquarium without too much waste? You can, with this Pro Atomizer. It creates fine CO2 bubbles which dissolve nicely in the water and are thus better absorbed by the plants.

  • Can be completely dismantled for easy maintenance
  • Built-in bubble counter
  • Can be installed horizontally and vertically
  • Connected to your external filter, not visible in your aquarium
  • Free additional membrane
  • Free advice via the blog, ebooks & email

The CO2 bubbles stick to the leaves, making it easier for the plants to absorb the CO2 and grow better. Ideal, right?

Original price was: €30,00.Current price is: €25,00.
- +

THE KEY BENEFITS

Easy to maintain

Built-in bubble counter

Not visible in the aquarium

Free membrane

Why CO2 is a must in your aquarium

CO2 – along with nitrate, phosphate and potassium – is one of the most important nutrients for your aquarium plants. In fact, 40 to 45 percent of the “dry weight” of all plants in the world consists of carbon. In other words, without carbon, your plants would simply die off and you would have algae. This, of course, is something you want to avoid in your aquarium.

Providing sufficient CO2 in your aquarium is therefore a must for healthy plant growth, especially if you use strong lighting. The Pro Atomizer makes it easy to mix the CO2 into your tank by creating a fine bubble which is easily captured by the plants and mixed with the water.

Result: better CO2, healthier plants and overall better plant growth!

The Pro Atomizer: robust & easy maintenance

The Pro Atomizer connects to the UIT-hose of your external aquarium filter. This means that you no longer have equipment in your aquarium itself, but you can hide everything nicely.

What’s nice and handy about this Pro Atomizer is that you can completely disassemble it for maintenance. You can simply unscrew the various parts, replace the membrane, screw it back together and you’re done! You get an extra membrane for free with each Pro Atomizer, so you can easily switch between the two.

The atomizer has a built-in bubble counter, so you can see exactly how many bubbles of CO2 you’re adding to your aquarium. The Pro Atomizer does not create a mist like the external atomizer, but the bubbles are finer than those of a CO2 diffuser.

Another handy feature: you can install this new version of the Pro Atomizer either horizontally or vertically. Just unscrew the faceplate, turn it 90°, mount it and you’re done.

Free advice & coaching

Are you having problems with your tank, such as algae or poor plant growth? At PlantedBox you get free advice tailored to your tank through the blog, the free e-books or just by email!

FREQUENTLY ASKED QUESTIONS

How to connect the Pro Atomizer to your CO2 system?

Connect a CO2 resistant CO2 hose to the Pro Atomizer’s bubble counter. Don’t forget to place a check valve between your CO2 system and the atomizer. Next, set the working pressure of your CO2 system to at least 2 bar and open the CO2 with your needle valve. You will see CO2 bubbles through the bubble counter which are then forced through the membrane of the atomizer to form small bubbles.

How should I connect the Pro Atomizer to my external aquarium filter?

Simply cut your OUT hose in 2 and place your Pro Atomizer in between. Make sure your Pro Atomizer is the right diameter before you cut the hose. The closer the atomizer is to your filter, the better, because then the CO2 has to travel a longer way to your tank and thus dissolves more CO2.

How do I place it horizontally?

Unscrew the faceplate with the provided screwdriver, then turn the part with the hose connector 90° and mount it again. Make sure the sealing ring stays in place.

Help, I don't see any bubbles?

First, check if the working pressure of your CO2 pressure regulator is set at least 2 bar. Still no bubbles? Then check if you have a leak somewhere by smearing soapy water or the PlantedBox leak detector on all your connections of your CO2 system (CO2 hose, bubble counter, Pro Atomizer, …)

How should I clean my atomizer?

This is easy with the Pro Atomizer. Unscrew the parts and replace the membrane with the spare membrane you got for free with the atomizer. Then put the dirty membrane in a solution of 1/10 bleach to water for a day. After that, scrub carefully, rinse with running tap water. Your membrane is now clean again!

WHAT DO OTHERS SAY ABOUT THE PRO ATOMIZER?